Choosing the Right Paint Roller for Effortless Wall Painting
Choosing the right paint roller is key for a flawless finish. Learn about nap thickness, paint type, and roller size for effortless wall painting.
So, you’re thinking about painting? Maybe a room in your house, or perhaps a business space. It can feel like a lot to figure out what tools you actually need. We get it. It’s easy to feel overwhelmed trying to pick out the right stuff. Today, we’re going to talk about one of the most important tools, besides the paint itself: the paint roller. Getting the right paint roller can make the whole job way easier and give you a finish you’ll be happy with.
Key Takeaways
- Just like chefs need good knives, painters need good rollers for a nice finish. They help apply paint smoothly and last longer.
- Different paint jobs need different rollers. Foam rollers are good for some paints, while natural fibers work well on rough spots.
- Match your paint roller to the surface. For textured walls, use rollers with longer naps to get into all the dips and bumps.
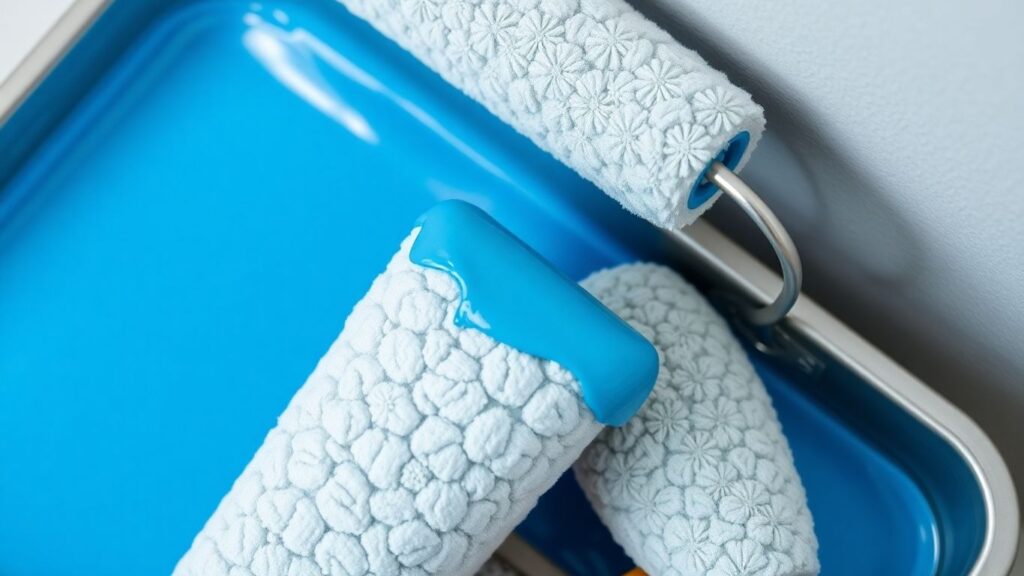
- Prep your roller before you start by wrapping it in tape and peeling it off to get rid of loose bits. This stops fuzz from getting in your paint.
- Don’t just dunk your roller in the paint can. Use a paint tray and roll it just enough to coat it evenly. This prevents drips and makes the paint go on smoother.
Understanding the Crucial Role of Paint Rollers
When you’re looking to paint a room, it’s easy to get caught up in choosing the perfect color or the best brand of paint. But honestly, the tool you use to apply that paint is just as important, if not more so. We’re talking about the paint roller, of course. It might seem like a simple tool, but the right one can make a huge difference in how your project turns out.
The Science Behind Effective Paint Roller Design
Think about it: a roller is designed to hold paint and spread it evenly. It’s not just a fuzzy tube on a stick. The way it’s constructed, from the material of the cover to the thickness of the nap, is all about how much paint it can hold and how smoothly it can lay it down. A well-designed roller acts like a reservoir and a spreader all in one. This means you can cover more area faster without constant trips back to the paint tray, which is a big time-saver. It’s all about efficiency and getting a consistent coat every time.
How Roller Choice Impacts Final Paint Finish Quality
This is where things get really interesting. The type of roller you pick directly affects the final look of your walls. Using the wrong roller can lead to streaks, an uneven texture, or even paint drips. On the other hand, the right roller, like a microfiber roller for smooth finishes, can give you that professional, polished look you’re after. It’s not just about speed; it’s about the quality of the finish. Different rollers are built for different jobs, and picking the right one means you avoid those annoying imperfections that can really bug you later.
Variety of Paint Rollers for Diverse Painting Tasks
It’s not a one-size-fits-all situation. You’ve got different types of rollers for different surfaces and paint types. For instance:
- Nap Rollers: These are the most common and come with varying nap lengths. Longer naps are great for textured walls, helping to fill in the nooks and crannies. Shorter naps are better for smoother surfaces.
- Foam Rollers: These are fantastic for achieving a super smooth, almost glass-like finish, especially on surfaces like cabinets or doors where you don’t want any texture.
- Specialty Rollers: There are even rollers designed for specific effects or materials, like textured rollers for creating patterns or mohair rollers for oil-based paints.
Choosing the correct roller is like selecting the right tool for any craft. It’s not just about getting the job done; it’s about getting it done well, with a result you can be proud of. The roller is your primary applicator, and its characteristics will define the final appearance of your painted surface.
So, before you grab the first roller you see, take a moment to think about your project. The right roller isn’t just a tool; it’s a partner in achieving that perfect paint job.
Selecting the Ideal Paint Roller for Wall Surfaces
So, you’ve got your paint, you’ve prepped the walls, and now it’s time to pick the actual roller. This is where things can get a little tricky, because not all walls are the same, and neither are the rollers designed to paint them. Picking the wrong one can lead to a finish that’s streaky, uneven, or just plain disappointing. It’s like trying to spread butter with a fork – it just doesn’t work right.
Choosing a Paint Roller for Smooth Wall Finishes
For walls that are super smooth, like freshly plastered surfaces or those with a satin finish already, you want a roller that’s going to give you that almost spray-like, flawless look. Think of bathrooms or hallways where you want a really clean, sleek appearance. A roller with a very short nap, often made of microfibre, is your best bet here. These are typically around 3mm to 5mm. They don’t have much fuzz, so they won’t leave any texture or lint behind. The goal is to mimic the smoothness of the wall itself.
- Microfibre rollers (3-5mm nap): Ideal for glossy or semi-gloss paints on smooth surfaces.
- Foam rollers: Can also work well, but be careful not to press too hard, or you might get air bubbles.
- Avoid: Long-nap rollers, as they’ll just add unwanted texture.
Matching Paint Rollers to Textured Wall Surfaces
Textured walls are a whole different ballgame. Whether you’ve got a subtle orange peel effect or something more dramatic like a knockdown or stucco finish, you need a roller that can get into all those nooks and crannies. If you try to use a short-nap roller on a rough wall, you’ll end up with patchy coverage because the paint just won’t reach the low spots. It’s a common mistake, and one that makes the whole job look amateur.
Here’s a quick guide:
- Lightly Textured Walls (e.g., subtle drywall texture): A medium-nap roller (around 10-15mm) is usually perfect. It has enough length to cover the texture without absorbing too much paint.
- Heavily Textured Walls (e.g., stucco, popcorn ceilings): You’ll need a long-nap roller (20mm or more). These are designed to hold more paint and reach deep into rough surfaces.
- Wallpaper or Wood Paneling: Often requires a medium to long nap, depending on the specific texture of the material.
When painting textured surfaces, remember that the roller’s job is to carry paint into the low spots. If the nap isn’t long enough, you’ll see the original wall color peeking through, no matter how much paint you try to apply.
The Importance of Nap Thickness for Different Textures
Nap thickness, or nap length, is probably the most important factor when you’re choosing a roller for walls. It’s literally the fuzzy part of the roller cover that holds and applies the paint. Getting this right makes a huge difference in how your paint job turns out. For a really smooth finish on a flat wall, you want a short nap. But if you’re dealing with anything bumpy, you need a thicker, longer nap to fill in all those dips and valleys. It’s all about making sure the paint makes contact with the entire surface. You can find a great selection of paint roller covers designed for various textures.
| Surface Texture | Recommended Nap Thickness | Why it Works |
| Smooth Walls | 3mm – 5mm (Short) | Prevents texture, provides a sleek, even finish. |
| Lightly Textured Walls | 10mm – 15mm (Medium) | Covers minor imperfections without excess paint use. |
| Heavily Textured Walls | 20mm+ (Long) | Reaches into crevices for uniform coverage. |
Key Factors in Choosing Your Paint Roller
So, you’re ready to tackle those walls, but which roller should you grab? It’s not as simple as just picking one off the shelf. Honestly, I used to just grab whatever looked decent, and let me tell you, it made a difference. The type of paint you’re using and the surface you’re painting are huge. Getting these right means less frustration and a much better-looking finish.
How Paint Type Dictates Roller Selection
Different paints just don’t play nice with all roller materials. It’s like trying to wear a wool sweater in the summer – just doesn’t work. For water-based paints, like latex or acrylics, synthetic rollers made from nylon or polyester are your best bet. They don’t soak up too much paint, which helps prevent drips and gives you a more even coat. On the flip side, if you’re using oil-based paints or stains, you’ll want to reach for natural fiber rollers. Think mohair or sheepskin. These materials handle the thicker consistency of oil-based paints better and help achieve a really smooth application. Using the wrong type can lead to a streaky mess, and nobody wants that.
Considering Surface Texture for Optimal Coverage
Your walls aren’t all the same, right? Some are super smooth, while others have a bit of texture. This is where the roller’s nap thickness comes into play. For smooth walls, like drywall or plaster, a roller with a short nap (around 1/4 to 3/8 inch) is ideal. It gets into the paint well and lays it down without leaving too much texture behind. If you’ve got textured walls – think popcorn ceilings or rough plaster – you’ll need a roller with a thicker, longer nap (like 1/2 inch or more). This longer nap can get into all those nooks and crannies, ensuring you get good coverage without having to go over the same spot a dozen times. For most ceilings, a 3/8 inch nap roller cover is recommended [4401].
Achieving Your Desired Finish Quality with the Right Roller
What kind of look are you going for? If you want that super-smooth, almost glass-like finish, especially on trim, doors, or furniture, a foam roller is often the way to go. They don’t have fibers, so they leave virtually no texture. Just be careful not to move too fast, or you might get bubbles. For general wall painting where a smooth, consistent finish is the goal, microfiber rollers are fantastic. They offer great coverage and minimal lint. If you’re aiming for a more traditional look on walls, a good quality synthetic roller with the appropriate nap thickness will do the trick. It really comes down to matching the roller to the paint and the surface for the best possible outcome.
Here’s a quick rundown:
- Smooth Walls: Short nap (1/4″ – 3/8″) synthetic or microfiber rollers.
- Textured Walls: Medium to long nap (1/2″ – 3/4″) synthetic rollers.
- Ultra-Smooth Finishes (Doors, Cabinets): Foam rollers.
- Oil-Based Paints: Natural fiber rollers (mohair, sheepskin).
Choosing the right roller isn’t just about making the job easier; it’s about the final look. A little thought upfront saves a lot of headaches and potential rework later on. Think of it as picking the right tool for any job – you wouldn’t use a butter knife to saw wood, would you?
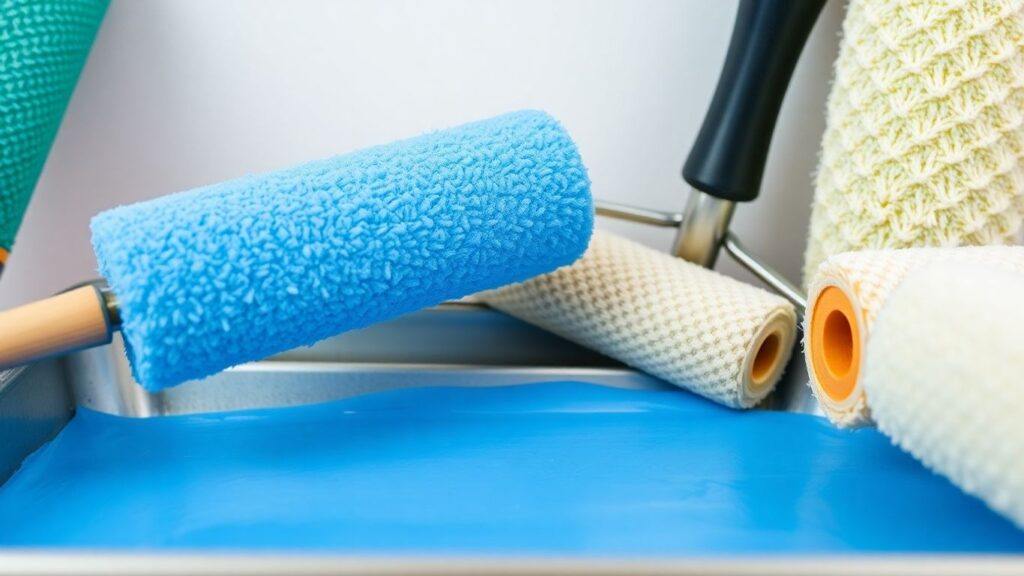
Exploring Different Types of Paint Rollers
So, you’ve got your paint, you’ve prepped your walls, but what about the tool that actually puts the paint on? It’s not just a simple cylinder with a handle, believe it or not. Different rollers are designed for different jobs, and picking the right one can seriously save you time and frustration. Let’s break down the main players you’ll find in the paint aisle.
Understanding the Versatility of Nap Rollers
Nap rollers are probably what most people picture when they think of a paint roller. They’re covered in fuzzy material, and the length of that fuzz, called the ‘nap,’ is super important.
- Short Nap (1/4″ to 3/8″): These are great for smooth surfaces like drywall or even metal. They don’t hold a ton of paint, which helps prevent drips and gives you a really clean, smooth finish. Think satin or semi-gloss paints.
- Medium Nap (1/2″ to 3/4″): This is your all-around workhorse. It can handle slightly textured walls and holds enough paint for decent coverage without being too heavy. Good for eggshell or satin finishes on most interior walls.
- Long Nap (1″ or more): If you’ve got rough surfaces like popcorn ceilings, brick, or heavily textured walls, you need a long nap. This fuzzy stuff gets into all the nooks and crannies, making sure you get even coverage. Just be aware, these can sometimes leave a bit of a ‘stipple’ effect.
The key is matching the nap length to your surface texture. Using a long nap on a smooth wall can lead to an uneven, fuzzy finish, and a short nap on a rough surface will leave you with missed spots.
The Smooth Finish Capabilities of Foam Rollers
Foam rollers are a different beast altogether. They don’t have that fuzzy nap; instead, they’re made of dense foam.
Foam rollers are fantastic when you’re aiming for that super-slick, almost glass-like finish, especially with higher sheen paints like gloss or high-gloss. They don’t leave lint behind like some fabric rollers can, and they apply paint very evenly. However, you have to be careful not to press too hard or move too quickly, or you might end up with tiny air bubbles in your paint. It’s best to use them with oil-based paints or specific types of latex paints where a super-smooth finish is the goal, like on cabinets or doors.
Specialty Rollers for Unique Textures and Finishes
Beyond the standard nap and foam options, there are rollers designed for specific effects or tricky situations.
- Textured Rollers: These aren’t for applying paint smoothly; they’re for creating texture. You can find rollers with patterns like faux wood grain, checkerboards, or even ones that mimic stucco or Venetian plaster. You typically use these over a base coat of paint.
- Mohair Rollers: Made from fine, dense fibers, mohair rollers are excellent for high-end finishes, especially with oil-based paints or clear coats. They provide a very smooth, lint-free finish and are quite durable, but they can be pricier.
- High-Density Foam Rollers: These are a step up from basic foam rollers, offering even better coverage and a smoother finish, often used for lacquers and enamels.
When you’re choosing, think about the paint you’re using and the final look you want. A little research into the roller type can make a big difference in how your project turns out.
Optimizing Your Paint Roller Technique
So, you’ve picked out the perfect roller for the job, but how you actually use it makes a huge difference. It’s not just about slapping paint on the wall; there’s a bit of a knack to it. Getting this right means less frustration and a much better-looking finish. Let’s break down how to make your roller work for you.
Preparing Your Paint Roller Before Application
Before you even think about dipping that roller into paint, give it a little prep. New rollers, especially the fuzzy kind, can shed little bits of fiber. Nobody wants those stuck in their paint job, right? A quick way to deal with this is to wrap the roller cover tightly with painter’s tape, then peel the tape off. Do this a few times. It grabs most of those loose bits. You can also just give it a good rinse under water and let it dry, which helps too. This little step saves you from picking tiny fibers off your freshly painted walls later.
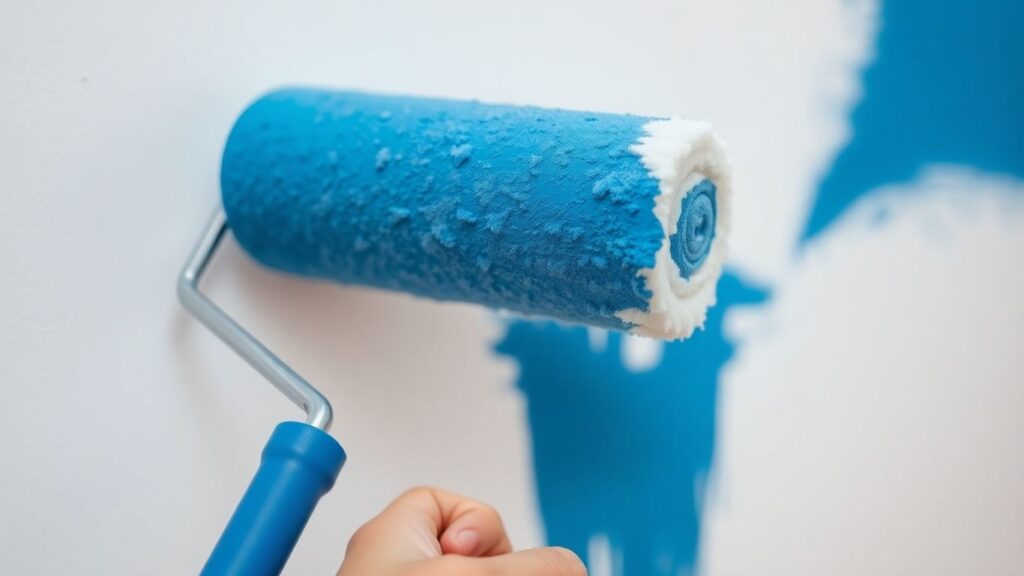
Mastering the Art of Loading Paint Onto Your Roller
This is where a lot of people go wrong. Dunking the whole roller into a paint bucket is a recipe for drips and uneven coverage. Instead, use a paint tray. Pour some paint into the tray, but don’t fill it to the brim. Then, roll the roller into the paint, just covering about half of it. Roll it back and forth a few times on the tray’s ramp to spread the paint evenly. You want a nice, consistent coat on the roller, not globs or dry spots. The goal is to load enough paint for good coverage without overloading it.
Effective Rolling Patterns for Uniform Paint Coverage
Now for the actual painting. Start at one edge of the wall or section you’re working on. Apply the roller with light to medium pressure, rolling upwards. Then, make a downward stroke, overlapping the previous stroke slightly. This creates a sort of “N” or “W” pattern. After you’ve made that initial pass, go back over the area with lighter, overlapping strokes, moving in a consistent direction (usually top to bottom) to blend everything together. This method helps ensure you don’t leave any lines or missed spots. It’s all about creating a smooth, even layer of paint. For really large areas, consider using knitted roller covers as they hold more paint and speed up the process.
Here’s a quick rundown of the rolling pattern:
- Load: Evenly coat the roller in the paint tray.
- Apply: Start at the top of your section, rolling upwards with light pressure.
- Overlap: Make a downward stroke, overlapping the previous area.
- Blend: Use light, overlapping strokes to smooth out the paint and ensure uniform coverage.
Don’t rush the process. Taking your time with each section, ensuring proper paint loading and consistent rolling patterns, will pay off big time in the final look of your walls. It’s better to do it right the first time than to have to go back and fix mistakes.
Choosing the Right Paint Roller Size and Frame
Alright, let’s talk about the bits and bobs that make painting actually work: the roller size and the frame it sits on. It sounds simple, but picking the wrong size can turn a quick job into a marathon, and a flimsy frame? Well, that’s just asking for trouble.
Determining the Best Roller Width for Your Project
Think of roller width like the size of your paintbrush, but for walls. For those big, open spaces like living room walls or a long hallway, you want something that covers ground quickly. A standard 9-inch roller is usually the go-to here. It holds a good amount of paint and gets the job done without you having to reload every two seconds. But if you’re tackling smaller areas, like doors, trim, or even furniture, a smaller roller, maybe 4 to 6 inches wide, is your best bet. It gives you more control and helps you avoid getting paint where you don’t want it.
Here’s a quick rundown:
- Large Walls & Ceilings: 9-inch rollers are your workhorses.
- Doors, Cabinets & Trim: 4 to 6-inch rollers offer precision.
- Corners & Tight Spots: Smaller specialty rollers or even brushes might be needed.
Selecting Sturdy Roller Frames for Durability
This is where you don’t want to cheap out. A good roller frame is the backbone of your painting operation. You need something solid that won’t bend or twist when you apply a bit of pressure, especially if you’re working with thicker paints or textured surfaces. Metal frames are generally the most reliable. They can handle being dipped, rolled, and generally put through their paces without giving up.
A wobbly frame can lead to uneven paint application and a lot of frustration. It’s worth spending a little extra on a frame that feels sturdy in your hand and doesn’t flex under pressure.
The Benefits of Ergonomic Handles and Extension Poles
Your comfort matters, especially on those long painting days. An ergonomic handle, one that’s shaped to fit your hand comfortably, can make a huge difference in preventing fatigue. It feels better to hold and can help you maintain a steadier hand. And then there are extension poles. These are absolute game-changers for reaching high ceilings or even just getting a better angle on walls without straining your back or needing a ladder for every little spot. They screw right onto your roller frame, giving you that extra reach and making the whole process much more efficient and less physically demanding.
Innovative Advancements in Paint Roller Technology
Eco-Friendly Materials in Modern Paint Rollers
It’s pretty cool how much thought is going into making paint rollers better for the planet these days. You’re starting to see more rollers made from recycled stuff or materials that are easier to break down afterward. This isn’t just a small trend; it’s a big shift. Think about it – less waste ending up in landfills. Some companies are even looking at plant-based fibers. It’s a good sign that the industry is paying attention to environmental concerns, and honestly, it makes you feel a little better about the project when you know your tools aren’t adding to the problem. It’s a smart move for manufacturers too, as more people are looking for sustainable painting supplies.
Ergonomic Designs for Reduced Painter Fatigue
Anyone who’s spent a whole day painting knows their arms and shoulders can really feel it. That’s where the new ergonomic designs come in. They’re focusing on making the handles more comfortable to grip, often with softer, non-slip materials. Some rollers also have better weight distribution, so they don’t feel as heavy or awkward to maneuver, especially when you’re up on a ladder or reaching for those tricky corners. It’s not just about comfort; it’s about being able to paint for longer without getting worn out. This means fewer breaks and potentially a quicker job overall. Plus, a comfortable grip means more control, which can lead to a smoother application.
Rollers Engineered for Specific Textures and Paint Types
Gone are the days when one roller had to do it all. Now, manufacturers are really getting specific. You can find rollers designed with special fibers or nap lengths that are perfect for certain wall textures. For example, those popcorn ceilings that used to be a nightmare? There are now rollers with extra-long naps that can get into all those nooks and crannies without you having to press too hard. Similarly, if you’re using a specific type of paint, like a high-gloss enamel or a thick textured coating, there’s likely a roller engineered to handle it best, preventing drips or uneven coverage. It’s all about matching the tool to the job for a professional-looking finish.
The market for paint rollers is growing, and a lot of that growth is thanks to these new innovations. People want tools that work well, are comfortable to use, and are kinder to the environment. It’s a win-win for everyone involved in painting projects, from the weekend DIYer to the seasoned pro.
Wrapping Up Your Roller Choice
So, picking the right paint roller might seem like a small detail, but honestly, it makes a big difference. Whether you’ve got super smooth walls or something a bit more textured, there’s a roller out there that’ll make the job go smoother and faster. Don’t forget to think about the type of paint you’re using and the finish you want. Using the right tool means less frustration and a much better looking wall when you’re all done. Happy painting!
Frequently Asked Questions
What’s the main reason for using a paint roller?
Paint rollers are super handy for covering large wall areas quickly and evenly. They grab a lot of paint at once, which means you can paint faster and get a smoother look without all the drips and streaks you might get with a brush.
How do I know which roller to pick for my walls?
It really depends on your walls! If your walls are super smooth, a roller with a short, fine nap is best. For walls that have bumps or textures, you’ll want a roller with a longer, thicker nap so it can get into all those little dips and bumps.
Does the type of paint matter when choosing a roller?
Yes, it does! For water-based paints, synthetic rollers usually work great. But if you’re using oil-based paints, you might want to go with a roller made from natural fibers for the best results.
What’s the difference between a nap roller and a foam roller?
Nap rollers have fuzzy fibers (the nap) that come in different lengths, making them good for various textures. Foam rollers are smooth and usually give a really slick finish, perfect for things like cabinets, but you have to be careful not to move too fast or they can make bubbles.
How do I get my roller ready before I start painting?
Before you dip your new roller in paint, it’s a good idea to prep it. You can wrap it in tape and then peel the tape off. This helps get rid of any loose fuzz that might end up on your wall.
Can I use the same roller for different painting jobs?
While you can sometimes reuse rollers if you clean them really well, it’s often best to have different rollers for different jobs. For example, a roller used for a rough texture might not give a smooth finish on a smooth wall, and vice versa. Plus, different paint types might need different roller materials.