Step-by-Step Guide to Foot Wash Sink Installation
Installing a foot wash sink can enhance hygiene and convenience in both residential and commercial spaces. Whether for a private bathroom, a prayer area, or a high-traffic public facility, a properly installed sink ensures safe, efficient, and hygienic foot washing. While professional installation is recommended for complex setups, many homeowners and facility managers can follow a clear step-by-step approach to ensure a successful installation.
Step 1: Choosing the Right Location
The first step in installing a foot wash sink is selecting an appropriate location. Consider areas with easy access to plumbing lines, sufficient space for comfortable use, and proper drainage. In residential settings, this might be a bathroom or an entryway near outdoor access. In public or religious facilities, placing the sink near prayer areas, locker rooms, or communal wash zones is ideal. Ensure there is enough room for users to stand comfortably and that the installation will not obstruct other fixtures or pathways.
Step 2: Preparing the Plumbing and Drainage
Before installation, evaluate the existing plumbing to ensure compatibility with the sink’s water supply and drainage requirements. You may need to install or adjust supply lines, drainpipes, and shut-off valves. Check that the water pressure is adequate and that the drainage system can handle regular use without leaks or blockages. This preparation is essential to prevent water spillage and maintain the hygienic standards expected of a dedicated foot washing station.
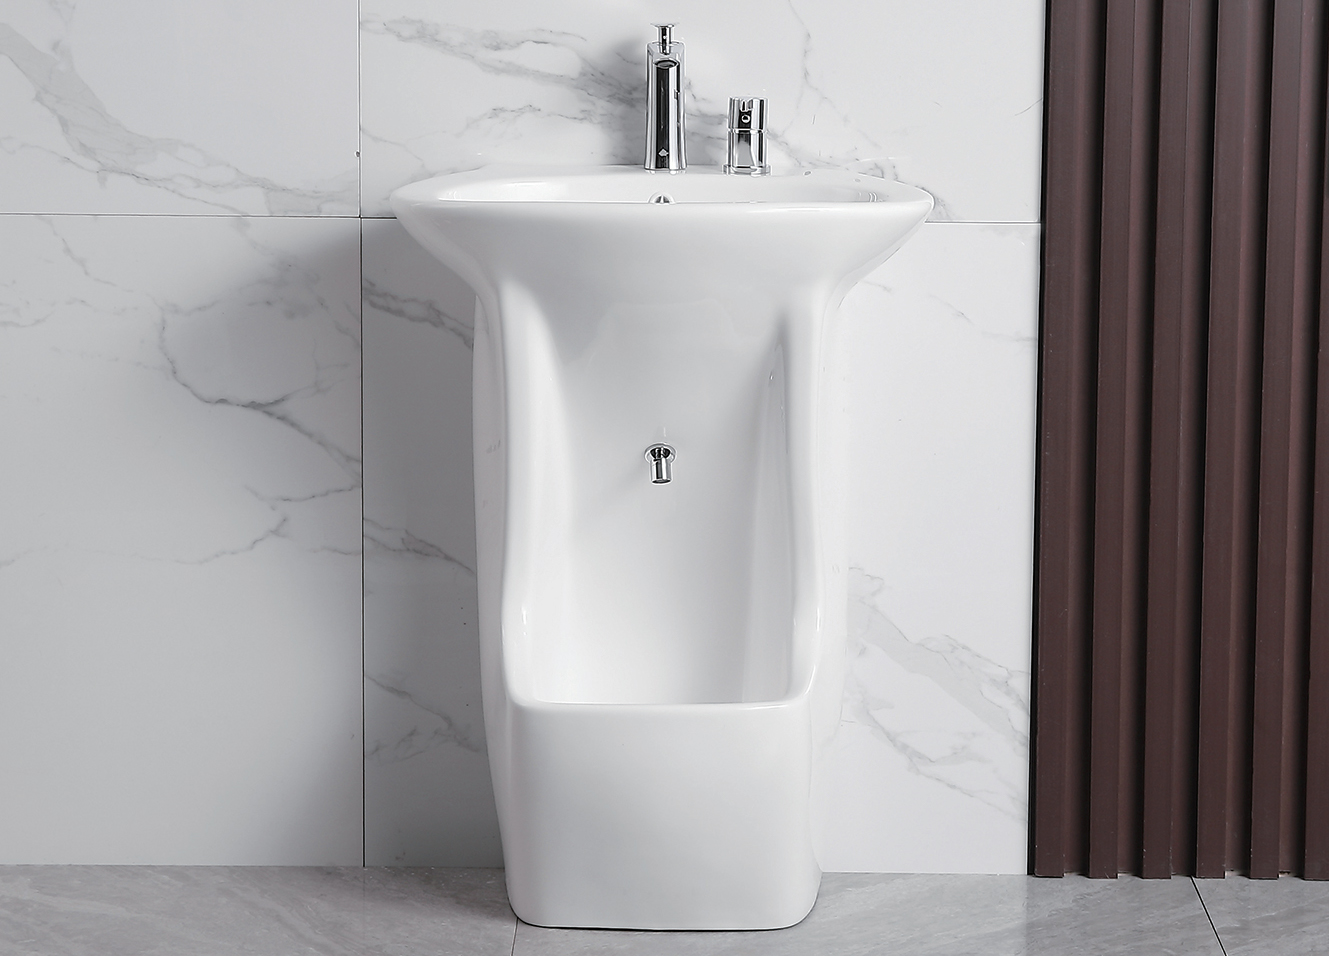
Step 3: Selecting the Right Foot Wash Sink
Choosing a high-quality foot wash sink simplifies installation and ensures long-term durability. Look for sinks made of solid surface or other nonporous materials that resist staining, corrosion, and bacterial growth. Consider features such as dual hand and foot washing areas, ergonomic height, and non-slip surfaces for safety. Selecting a reliable model reduces potential installation challenges and ensures the sink remains functional for years to come.
Step 4: Installing the Mounting Hardware
Most foot wash sinks are either wall-mounted or pedestal-style. Begin by following the manufacturer’s instructions to attach brackets or supports securely to the wall. Ensure that the mounting hardware is level and capable of supporting the weight of the sink. For pedestal models, position the base properly and verify stability before proceeding with plumbing connections. Proper alignment at this stage is critical to ensure the sink functions correctly and remains stable during use.
Step 5: Connecting Water Supply Lines
Once the sink is securely mounted, connect the hot and cold water supply lines. Use appropriate fittings and seals to prevent leaks, and ensure the taps are easily accessible for users. Double-check that the water flows smoothly and that both taps provide adequate pressure. Installing shut-off valves at this stage allows for easy maintenance and reduces the risk of water damage in case of future repairs.
Step 6: Installing the Drain System
Next, connect the sink’s drain to the existing plumbing. Make sure the drain pipe is properly aligned and sealed to prevent leaks. Test the drainage system by running water through the sink and checking for any standing water or seepage. Some foot wash sinks feature integrated slopes and channels that guide water efficiently toward the drain, helping to minimize mess and ensure effective cleaning during daily use.
Step 7: Testing and Final Adjustments
After completing the water and drainage connections, test the sink thoroughly. Run water through both the foot and hand washing areas, checking for leaks, proper drainage, and stable mounting. Make any necessary adjustments to the plumbing or hardware to ensure optimal functionality. Confirm that the height and position are comfortable for users of different ages and mobility levels.
Step 8: Finishing Touches and Maintenance Tips
Finally, clean the sink and surrounding area to remove any installation debris. Apply any recommended sealants or finishes according to the manufacturer’s instructions. Regular maintenance, such as wiping down surfaces, checking for leaks, and ensuring taps remain functional, will extend the lifespan of your foot wash sink and maintain hygiene standards.
Conclusion
Installing a foot wash sink is a practical way to enhance hygiene in both private and public spaces. By carefully selecting the location, preparing plumbing, choosing a high-quality sink, and following a step-by-step installation process, you can ensure a durable, safe, and user-friendly washing station. Proper installation not only improves cleanliness but also contributes to a more organized and convenient environment for daily foot care.